

Old Hollywood Glamour Portraits in 10 minutes
December 19, 2019
Recently I attended a photography event hosted by Let’s Collab PDX, a Portland, OR photography meetup. The theme of this meetup was old Hollywood glamour, which I was thrilled about because I absolutely love portraits of movie stars from the 40’s, 50’s, and 60’s. While the signature traits of old Hollywood glamour portraits have to do with clothing, makeup, and hairstyle, it’s also highly dependent on the lighting. With this in mind, I’d like to go through a step-by-step of how I created the above portrait. But first, just a little back story on the event.
This meetup was held in a local Portland studio and was a pretty unique format: there were a number of portrait “stations” that were set up around the studio. Every 10 minutes or so, photographers would rotate in one direction, and models would rotate in the other direction. My first station was actually the studio entrance/waiting area. While much of the studio had pleasing light from the large bank of windows, this area was dimly lit with some drab overhead yellowish lighting that wasn’t ideal for creating an old Hollywood portrait. However, the existing light didn’t really matter because I was going to light the scene in a way that would change the entire mood. Here’s how I did it.
Step One: Set The Ambient Light
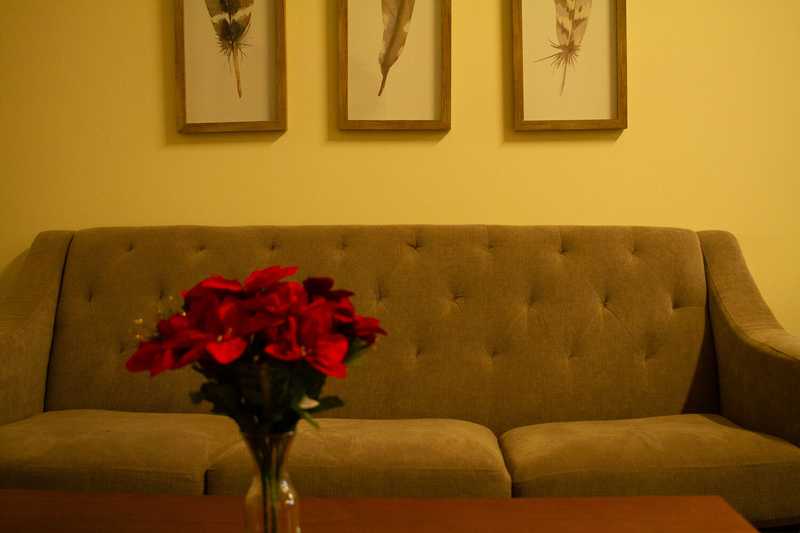
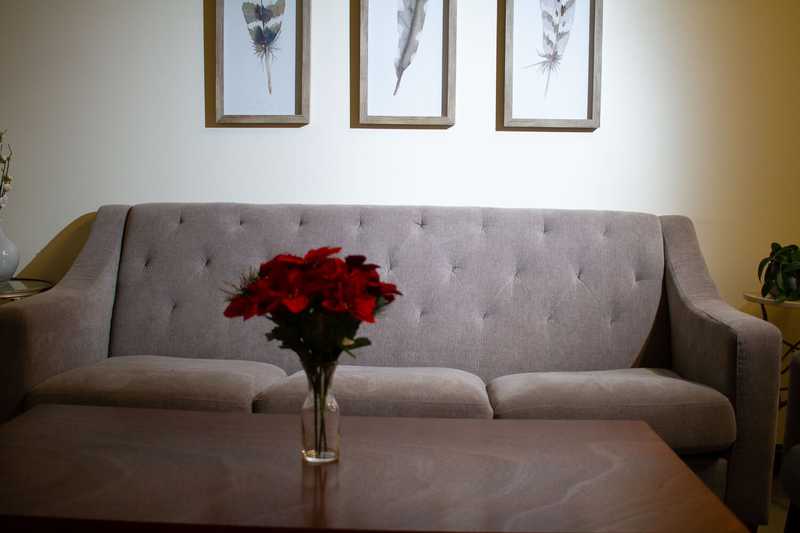
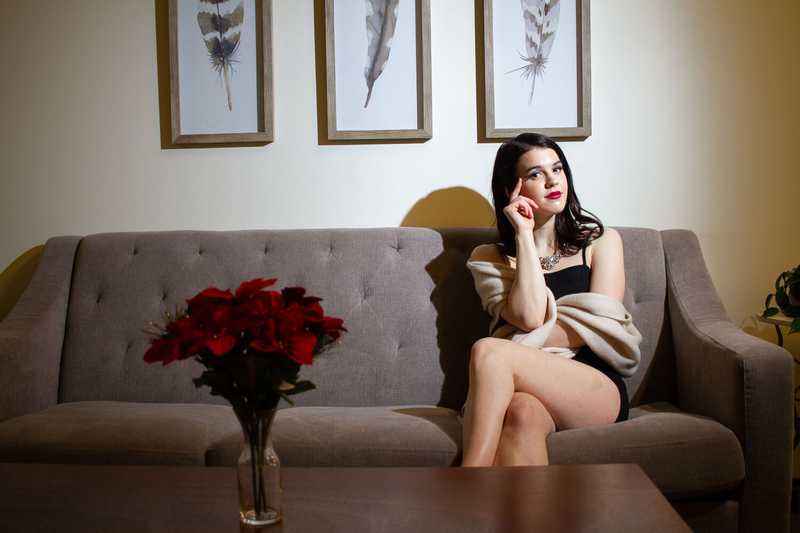
I had a few minutes to rough in my lighting before Madeline (the model and also host of the event) arrived on the scene. Above is one of the first test shots I took while trying to find a composition.
After taking this test shot, I had a few thoughts: “What on earth am I doing? Wow that lighting is yellow. The artwork on the wall is crooked. Will anyone be able to tell these flowers are fake? How am I going to pull off a dramatic shot in the next few minutes?
Then I reminded myself not to freak out and actually think through the shot. I started by straightening the artwork, because that was something I knew I could accomplish. Second, I wasn’t too concerned with the yellow color-temperature, because my intention was for this portrait to be black and white. (In the end I kept the photo in color so I had more color adjustments to do in post-production to remove the yellow cast, but that didn’t matter right now.)
To create some drama, I dialed the ambient light way down with the intention of lighting the model separately with a high-contrast hard light source. I looked at my camera’s light meter and adjusted my exposure so it would be 1 1/2 stops underexposed. Why did I do that? I wanted there to be some ambient light in the scene, but not have it be the dominant light. I could have kept going where there was no ambient light registering at all, but then everywhere my flash wasn’t illuminating would just be pure black. That’s not what I had in mind.
Step Two: Set the Main Light
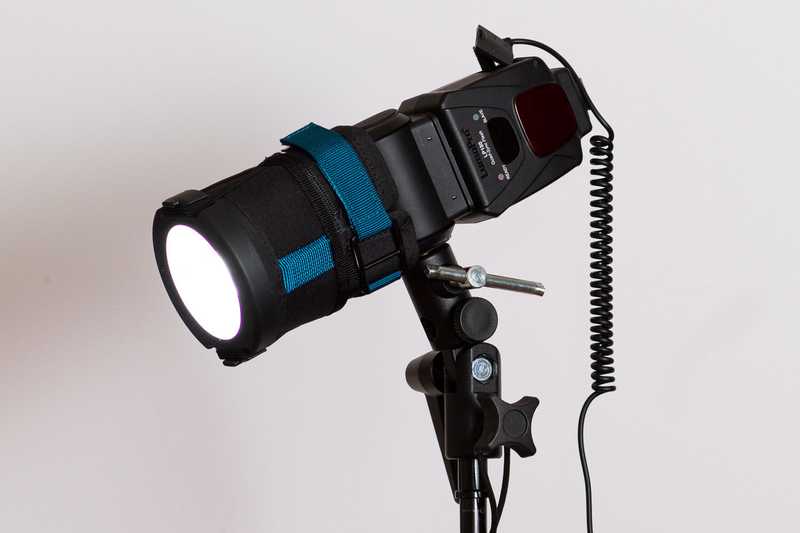
Now it was time to actually light the scene. I attached my flash to a light stand situated camera right at about a 45 degree angle and at a height of about 6 feet. I attached a rogue grid holder and bezel to the flash, which focuses the light just a bit, but not so much that it becomes a super-narrow spot light. Importantly, it turns a rectangular flash head into a round light source. An unmodified hot shoe flash would have looked very different.
Since I had already dialed in my camera settings for the ambient light, I simply adjusted the flash power up and down until I found a setting that I liked.
Here’s my lighting setup and my flash with the modifier I’m referring to:
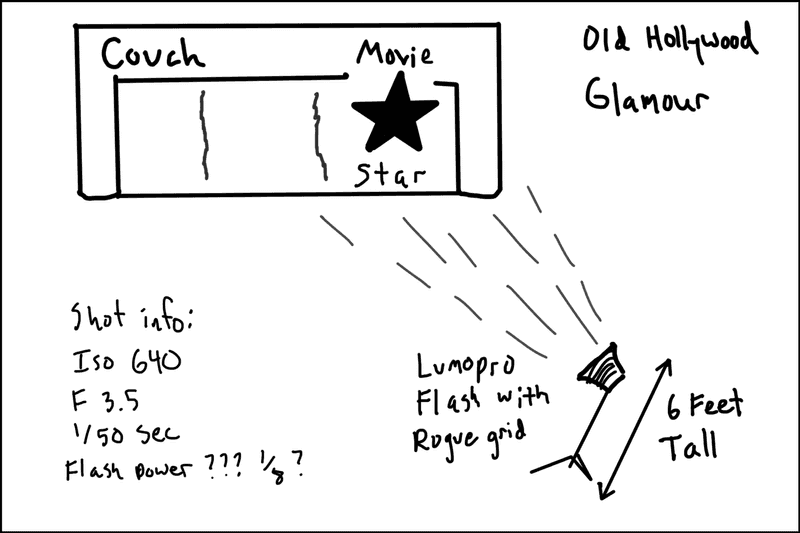
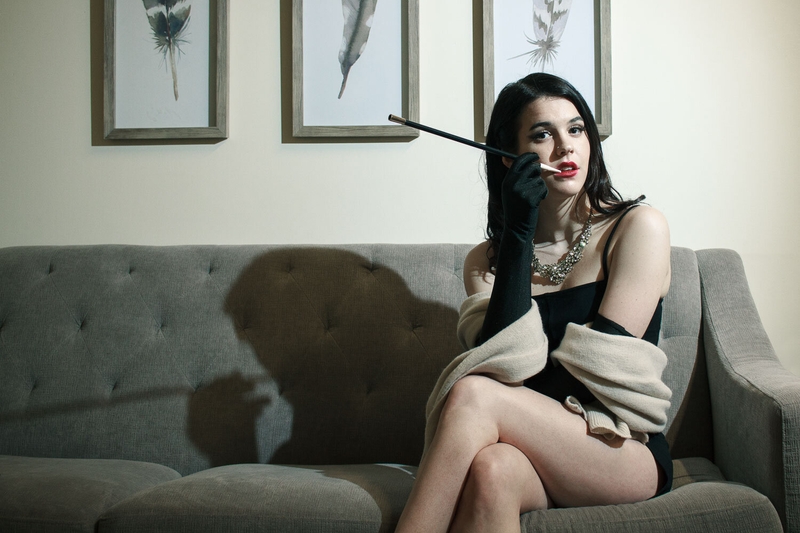
The key ideas here to get that old Hollywood look is to have the light higher than you normally would, and also have it be a focused, hard light. Since the light was off to the side, I knew it would be creating a lot of shadows in the scene and I would have to work with Madeline on the posing in order to have the shadows look flattering.
Step Three: Summon the Movie Star
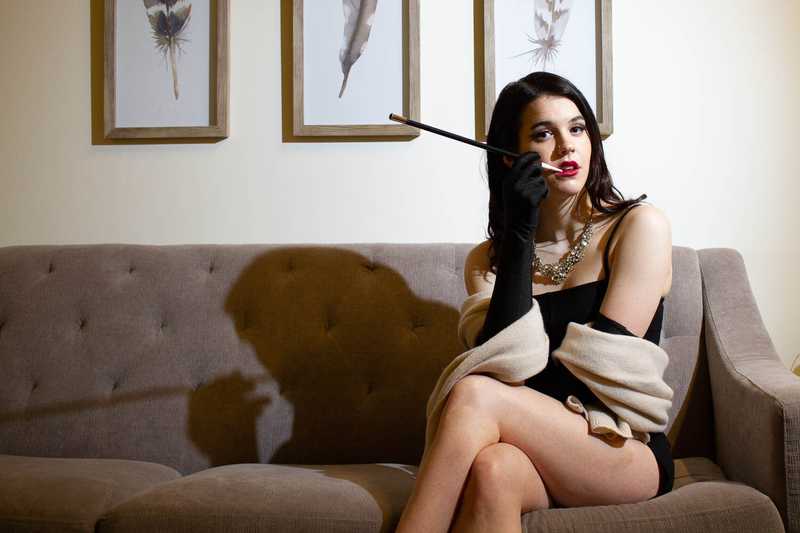
Now that I had things dialed in more or less, I took a few more test shots of Madeline once she sat down on the couch. I told her not to worry about posing while I was still fine-tuning the light. After a couple more adjustments, we were in business. We only shot photos for about five minutes in total, which was just enough time to try a few posing and prop variations. I shot a few frames with the flowers in the foreground, and then removed them got rid of the table all together in the composition. Madeline also added her cigarette holder as a prop. No lit cigarette though because she didn’t want the studio to charge extra and also, boo tobacco.
While I expected a shadowy photo from the position of the flash, I didn’t plan on it looking so cool and mysterious when she sat at the edge of the couch and held the cigarette holder to her mouth. This shadow really adds some dimension and film-noir vibes to the scene!
Here’s the final image, directly out of camera with no adjustments, followed by my edited photo:
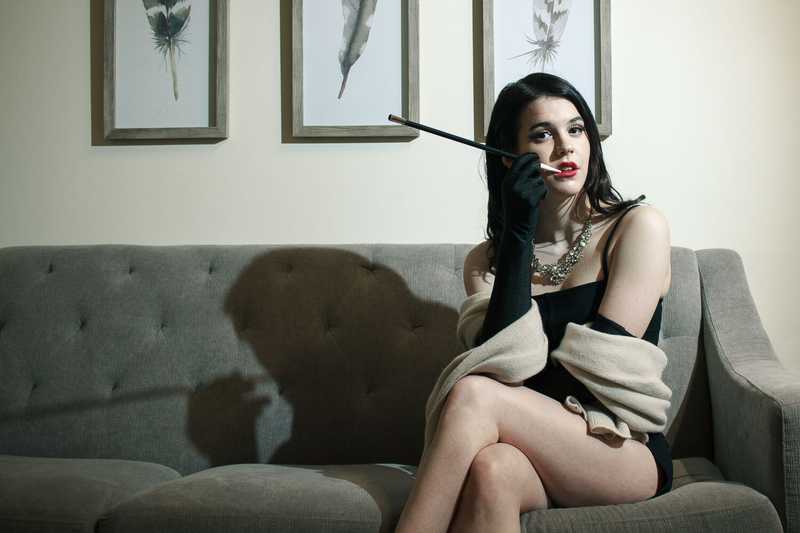
Since this blog post is all about the lighting and not the post production, I’m not going to cover the details of how I processed the image in Adobe Lightroom and Photoshop. But I will tell you that I didn’t have to do much. Just some color adjustments and minimal retouching.
Conclusion
So there you have it. With about 5 minutes of setup time and another 5 minutes actually taking photos, I was able to create some pretty fun images. If I had more time, I would have developed the look even more. I would have tried adding a hair light to create some separation from the background. I would have added an actual lit cigarette to the holder (¡Escandalo!). I also would have swapped out the wall decor with something that emphasized the old Hollywood glamour look a bit more. Nonetheless, this was just for fun and I can always try recreating this look in the future during an actual full-length photo shoot.
I hope this blog post helps if you have any interest in creating a Hollywood glamour photo yourself. All you really need is a camera, a single hard light source on a stand, and a movie star. Let me know in the comments if you have any questions on the setup or need any clarification.
-Chris