

Headshot Retouching: Before and After
August 15, 2019
Retouching can make or break a professional headshot. It can make you look like your best self after a good night’s sleep. It can also make you look so “perfect” that it looks unnatural and just off. Have you ever seen a headshot of a co-worker that is frighteningly airbrushed? Don’t get me wrong…the subject of image retouching is very subjective. Many retouch artists will think my approach doesn’t go far enough. Some photographers may balk at the idea of retouching an image at all. But I’m not here to debate retouching. I simply want to show you the before and after from a recent headshot session. That way, you know what to expect if you book a session with me.
To be clear, I approach retouching for professional headshots a bit differently than I do with other genres of photography. I think a light touch is the way to go most of the time with headshots. I like to subtly enhance a photo, not create a flawless, ideal image. Let’s save that for the fashion magazine covers.
Headshot Before Any Editing
Let’s take a look at my client’s favorite photo from a recent professional headshot session I did at my home studio. This is the file directly out of camera with no adjustments:
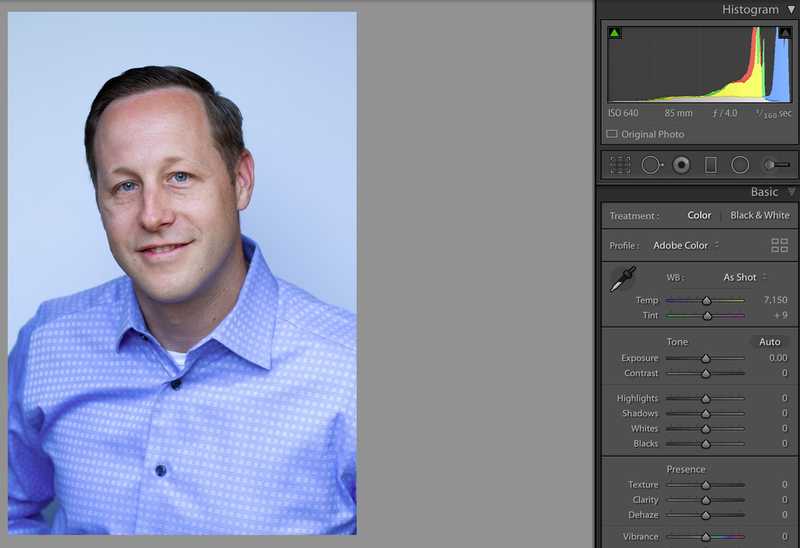
We’re off to a good start, if you ask me. His expression and pose are great in this photo. I like how confident and approachable he looks. The lighting is clean, simple, and flattering. I made sure to get all these things right before even thinking about what I would do in Photoshop.
Headshot After Initial Editing
Even though this is a pretty solid photo right out of camera, there are a few things I adjusted when doing my initial edit. Let’s take a look at the photo after these changes:
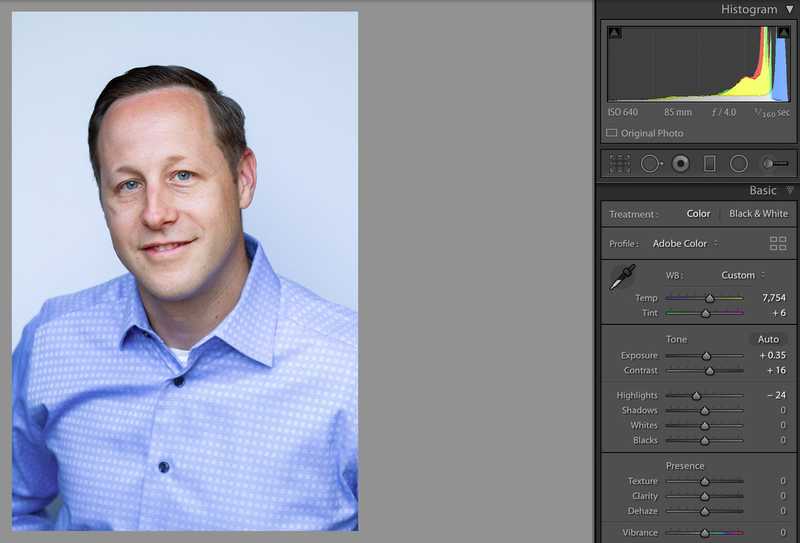
Here’s what I did in Adobe Lightroom
- Temp/tint color adjustments. The skin tones are now more accurate and not so blue.
- Exposure and contrast were boosted a bit.
- Highlights were lowered.
The photo now looks more vibrant and eye-catching, in my opinion. You could call it a day at this point, but let’s keep going a bit more because we can still improve the photo while keeping the integrity intact.
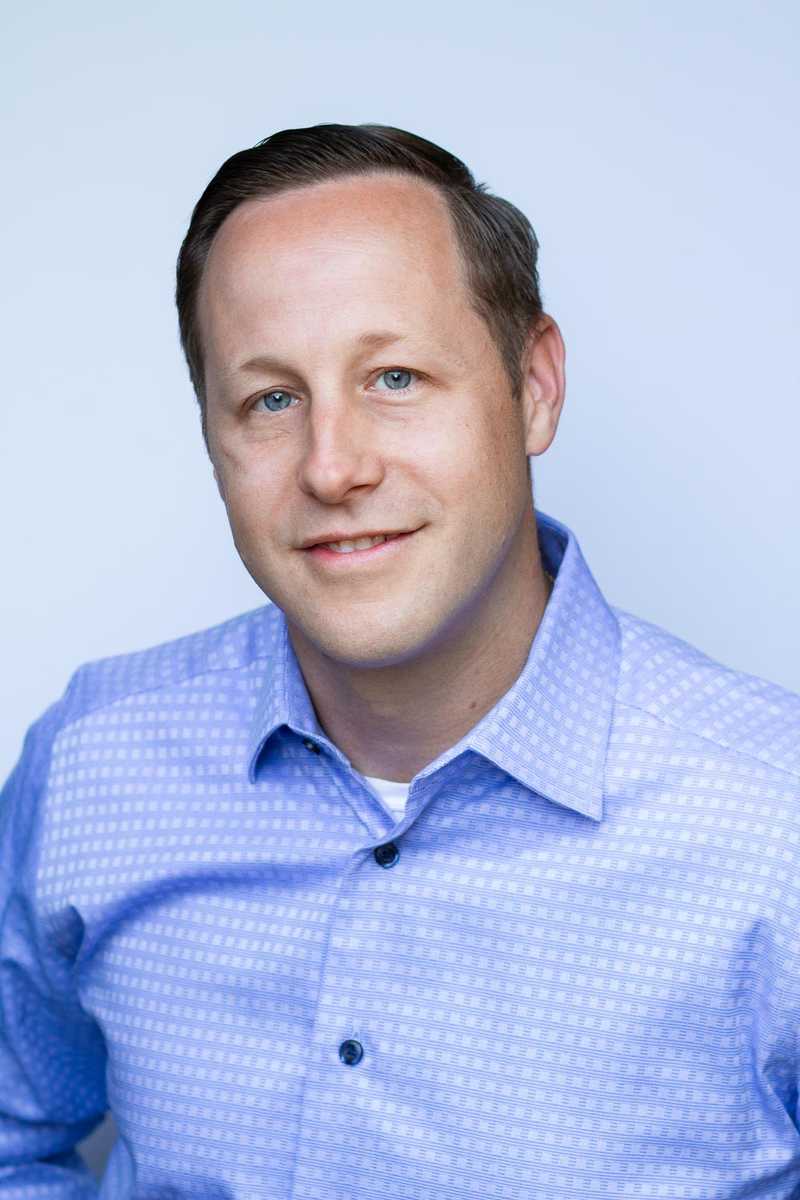
Headshot After Retouching
Let’s go into Photoshop now (cue the lights).
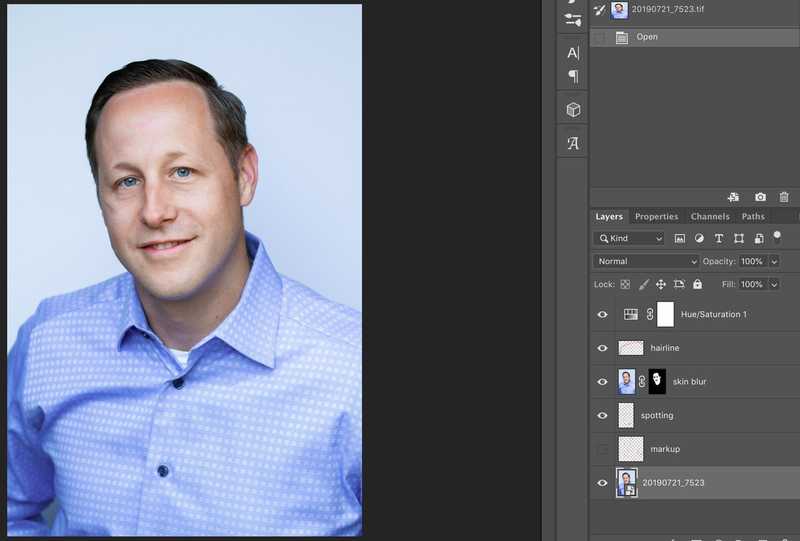
Here’s what I did in Photoshop
- Blemish, wrinkle, and fly-away hair removal.
- Skin blur to lower skin texture and contrast a bit.
- Further color adjustments so skin tones are more even and pleasing.
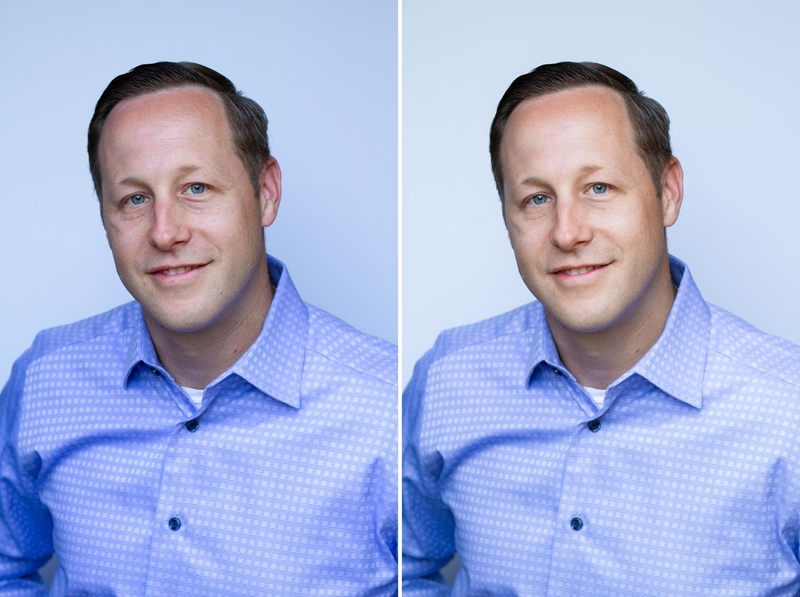
A little retouching made all the difference, if you ask me! Here it is displayed full-size:
Conclusion
Hopefully this gives you a good idea of my editing process and philosophy for a headshot session. I want the photo to look like you, on your best day, after a good night’s sleep. My goal is to not have you notice the retouching at all. Check out my headshot gallery to see more examples!
-Chris
(Note: I received permission from my client to post photos of the editing process. Don’t worry, I’m not going to do this with your photo before asking you first!)