

Lensbaby Omni Creative Filter System
June 18, 2019
I recently created some promotional photos for the launch of a brand new Lensbaby product called the Omni Creative Filter System. This product works with your existing lenses and creates a huge variety of effects that range from subtle haziness to heavy-handed “I can see time” psychedelic effects. How does all this work? Maybe you’ve heard of prism photography? Traditionally, this is where a hipster wearing an antiquated hat holds a prism in front of his camera lens while photographing a pretty girl in oversized eyeglasses to create a rainbow pattern on her face (Bonus points if she’s wrapped in fairy lights). Although hand-holding a prism does work, it creates another problem. How does the hipster adjust his hat with no free hands to spare? Also, how does he repeat the desired effects when even slightly moving a prism will dramatically change how the image looks?
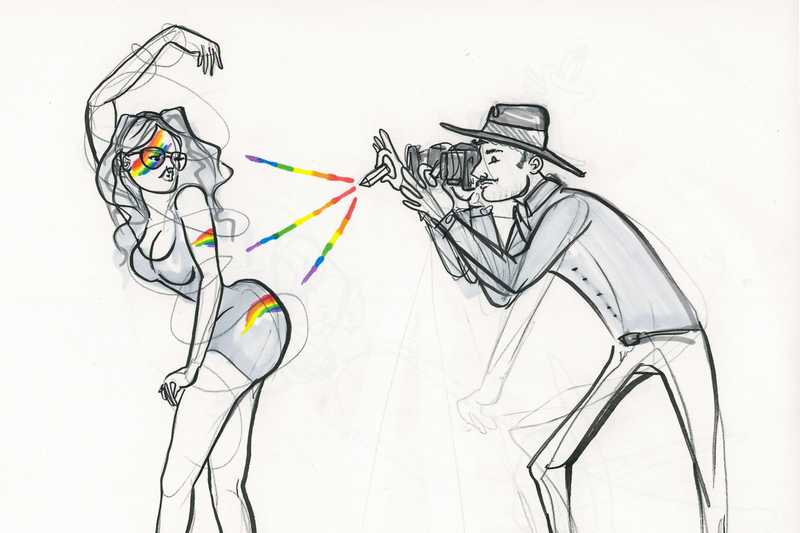 Hipster with his hands full (Illustration by Quinn Curnow)
So that’s where the Lensbaby Omni Filter System comes in. You can create rainbows on girls wearing glasses, but there’s a lot of other looks you can achieve too. Most importantly, the prisms/filters magnetically attach to a filter ring that goes around your camera lens. Once you position the filter exactly where you want it, the very strong magnets will keep it in place. Here’s a couple product photos to illustrate what I mean:

I used a pre-release version of this product with my cropped sensor Canon SLR and a few prime lenses (24mm, 50mm, and 85mm). The Omni Filter comes in two versions (small and large), and your lens filter ring size(s) will determine which one you buy. For my lenses, I used the small version and a couple of the included filter step-up rings, which worked fine. Shooting with prime lenses means you have to transfer the filter ring each time you change a lens. This is kind of annoying, but changing prime lenses while walking around is kind of annoying, so it goes with the territory. If you use a zoom lens, the whole process would probably be much faster.
Photo Walks
While creating photos with this product, I did a lot of walking around Portland and just experimenting because I really didn’t know what to expect. I’m always drawn to cool industrial buildings, so that’s where I started:

One of my first realizations was that the Omni Filter lets you “repeat” subject matter in the frame (above). This creates a pretty cool ghost-like effect. I personally have been shooting a “double” theme for a lot of my personal work in the last year. What I mean by this is the idea of people and things existing in two places at the same time, almost like a body and spirit slightly out of phase. I’ve been using double exposures, flash with a slow shutter speed, and other techniques to achieve different looks. The Omni Filter fits right in with helping me explore this theme further.

I was also able to create bendy-looking photos with my 24mm lens and the triangular prism attachment (below):

“What’s going on here?” That’s a phrase I said to myself a lot while using the product. After a while, things started making sense. I realized I was able to reflect out-of-frame elements back into the frame and place them wherever I wanted. I positioned the triangular prism horizontally on the lower third of the frame and twisted it until I got the overlap that looked cool. Now that my gear was set, I could concentrate on shooting. This created an almost fish-eye lens look on the bottom part of the frame. I personally like this photo a lot.
I was also able to create some strange repeating lens flare when shooting in the direction of the sun:

This lens flare effect was carefully placed in the frame, making sure to not cover the building.
Wabi Sabi
Wabi Sabi is a Japanese world view that embraces the idea of flawed beauty, impermanence, and serene melancholy. That sounds like Portland in a nutshell. But that also sounds like this product in a nutshell. If you put an object in front of a camera lens, you’re going to create some optical flaws. Are you cool with that? I am.
There’s a trend happening in photography that’s a response to the technical “perfection” and predictability of shooting digital. Photos are now frighteningly clean and sharp. Cell phones take photos that stand up to the technical quality of photos taken with proper cameras. Speaking of proper cameras, there are 50-100 megapixel monsters coming out that create noiseless photos all the way to ISO 2 trillion. How boring is that?
If the act of taking a technically “perfect” photo is in the hands of everyone, a viable way to be different is to add some imperfection into the equation.
Water Tower
On another photo walk, I found a pretty sweet water tower that was a great photo subject:

As I was getting my composition, I noticed the moon was already out. I thought it would be cool to play off that shape by creating some half-moons of my own with the Lensbaby Omni Filter in front of my lens.
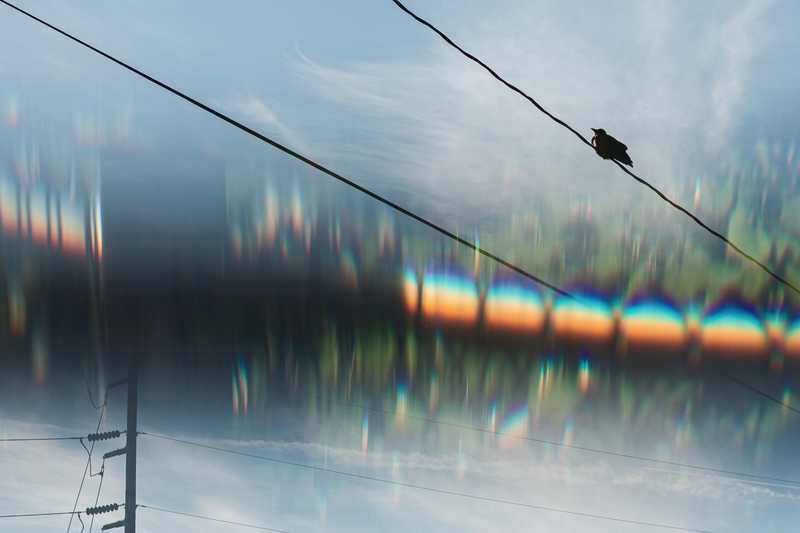
Here’s another composition of the same water tower, with a bird just happening to fly in frame while taking the photo:

I think one of my favorite aspects of using this product is the ability to fill negative space in a composition with an effect. I feel like if the repeating effects weren’t present on the right side of the frame (above), the composition would be too heavy on the left side.
Below is another photo I took while walking around the water tower. “What’s going on here?”
Portraits and Nature
When I met with Lensbaby to discuss possible subject matter for the promotional photos, they said they already had a number of portrait examples, so I didn’t spend much time experimenting in this genre. However, one day I did go on a short walk with my partner and we found a nice spot for a photo-op. I dialed in a really dreamy romantic effect with the seahorse attachment:

This effect really lowered the contrast and created some cool haze, which made for very pleasing skin tones. I plan on trying this product out on some of my upcoming portrait shoots. I feel like it would work great for anything from senior portraits, model shoots, or even weddings.
Another day, I went to the rose garden at Peninsula Park, which is one of my favorite parks in Portland:

I used the pointed crystal on the above photo of the roses, being careful to only cover the left side of the frame. The crystal lowered contrast and made the rose on the right really stand out.
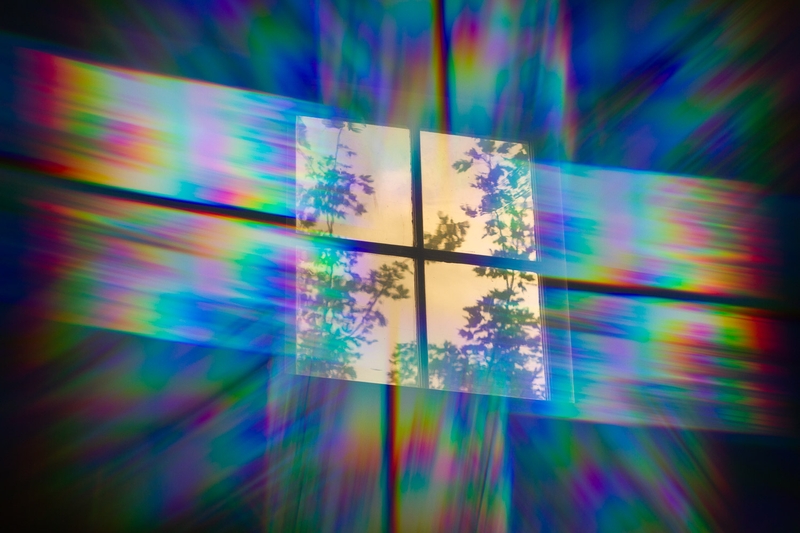
Indoor Rainbows
Although I spent most of my time outdoors on photo walks while testing the Lensbaby Omni Creative Filter, I also did a couple of indoor tests. Product and still life photography is all about making small adjustments and refining the photo, so the Omni has a lot of possibility for those applications. Once you dial in the desired effect by moving the magnetic attachment in front of the lens, it’s set. It’s like a tripod for your prism. And just like a tripod, don’t bump it once it’s set in place (I’m talking to myself here). Also, you should focus your camera before placing an effect in front of the lens. I found it best to use back button focus with this product.
Here is a photo of a rainbow candle I photographed in my living room while using both the rainbow filter and the seahorse attachment:

This photo was difficult to pull off, but I’m quite happy with the result. I started by getting my composition and adjusting the rainbow filter attachment. The main rainbow effects were precisely adjusted to balance the composition and frame the candle. The seahorse attachment was placed in front of the rainbow film and created some further diffused rainbow effects, which filled things in. Finally, I added a tungsten-gelled flash on a stand (camera left) to illuminate the left side of the candle stick. Now you can clearly see it’s a rainbow candle. Get it? Rainbows.
I also took a photo I took of my guitar with the rainbow filter on a separate occasion:

You can see I like the upper frets the most. :)
Final Thoughts
I’m pretty excited about the work I’ve created while experimenting with the Omni Filter so far. Although, I feel like it took me a little while to get used to things. There’s some technique involved here, but I think that’s a good thing. That means it’s a very diverse product. Once I started figuring things out, I was able to start “seeing” the effect I wanted before actually reaching into my bag for the correct attachment. It’s just like any other piece of gear. The more you use it, the less you have to think about it.
I feel like flaws and unpredictability are part of what makes photography fun. In the last few years, digital photography has become so “perfect,” I think it’s time to embrace a little Wabi Sabi. Now, I wonder how the Omni Filter behaves with a film camera???? (Next project).
Special thanks to Lensbaby for asking me to try out the Omni Creative Filter System!
-Chris